Build your First Page in Pixelesq
Get your website up and running fast. This quickstart walks you through creating a new page, adding content, and publishing it live. In just a few minutes, you’ll have a custom page on your site. No coding or design experience needed!
Step 1: Create a New Page

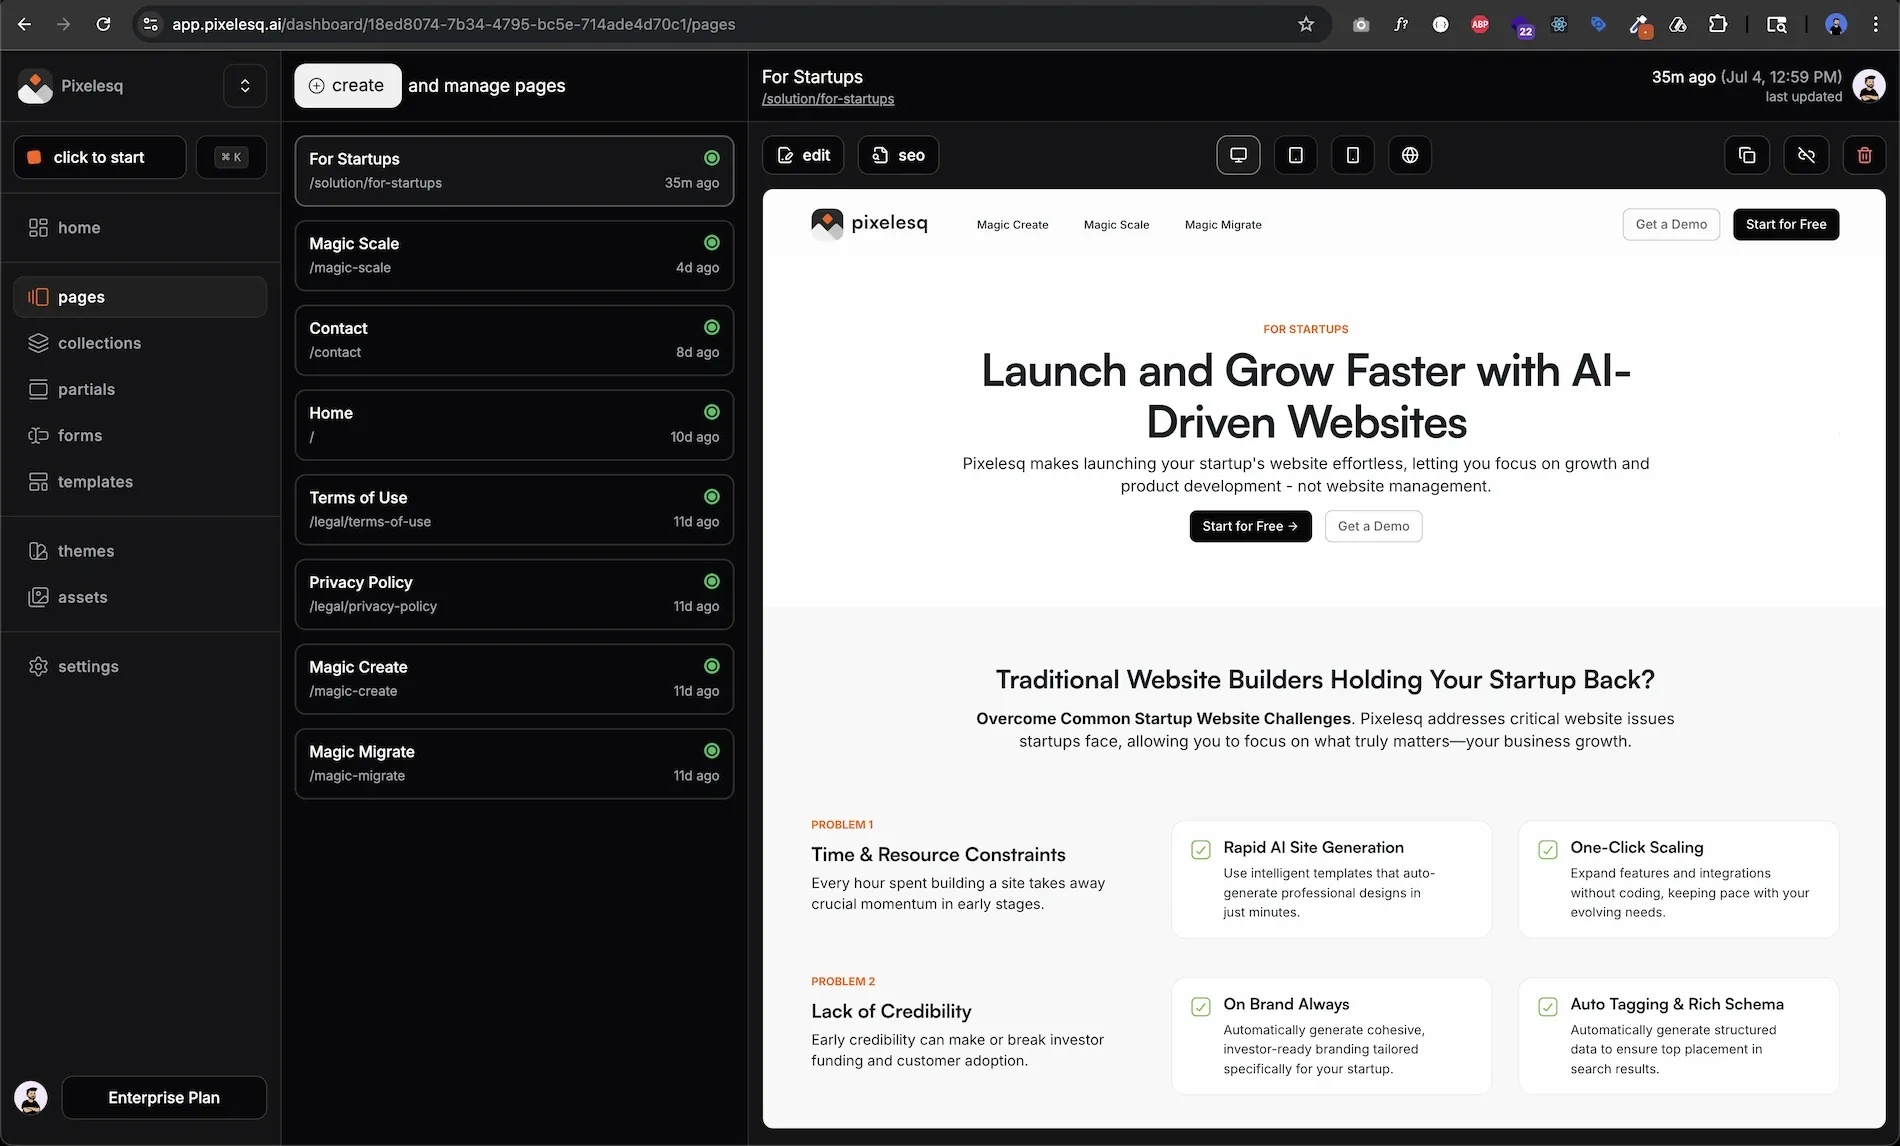
Open the Pages module in Pixelesq. At the top of the page list, click the Create button (❶) to start a new page:contentReference[oaicite:0]{index=0}. This button opens a form where you’ll enter basic page details. It’s your starting point for adding a fresh page to your website.

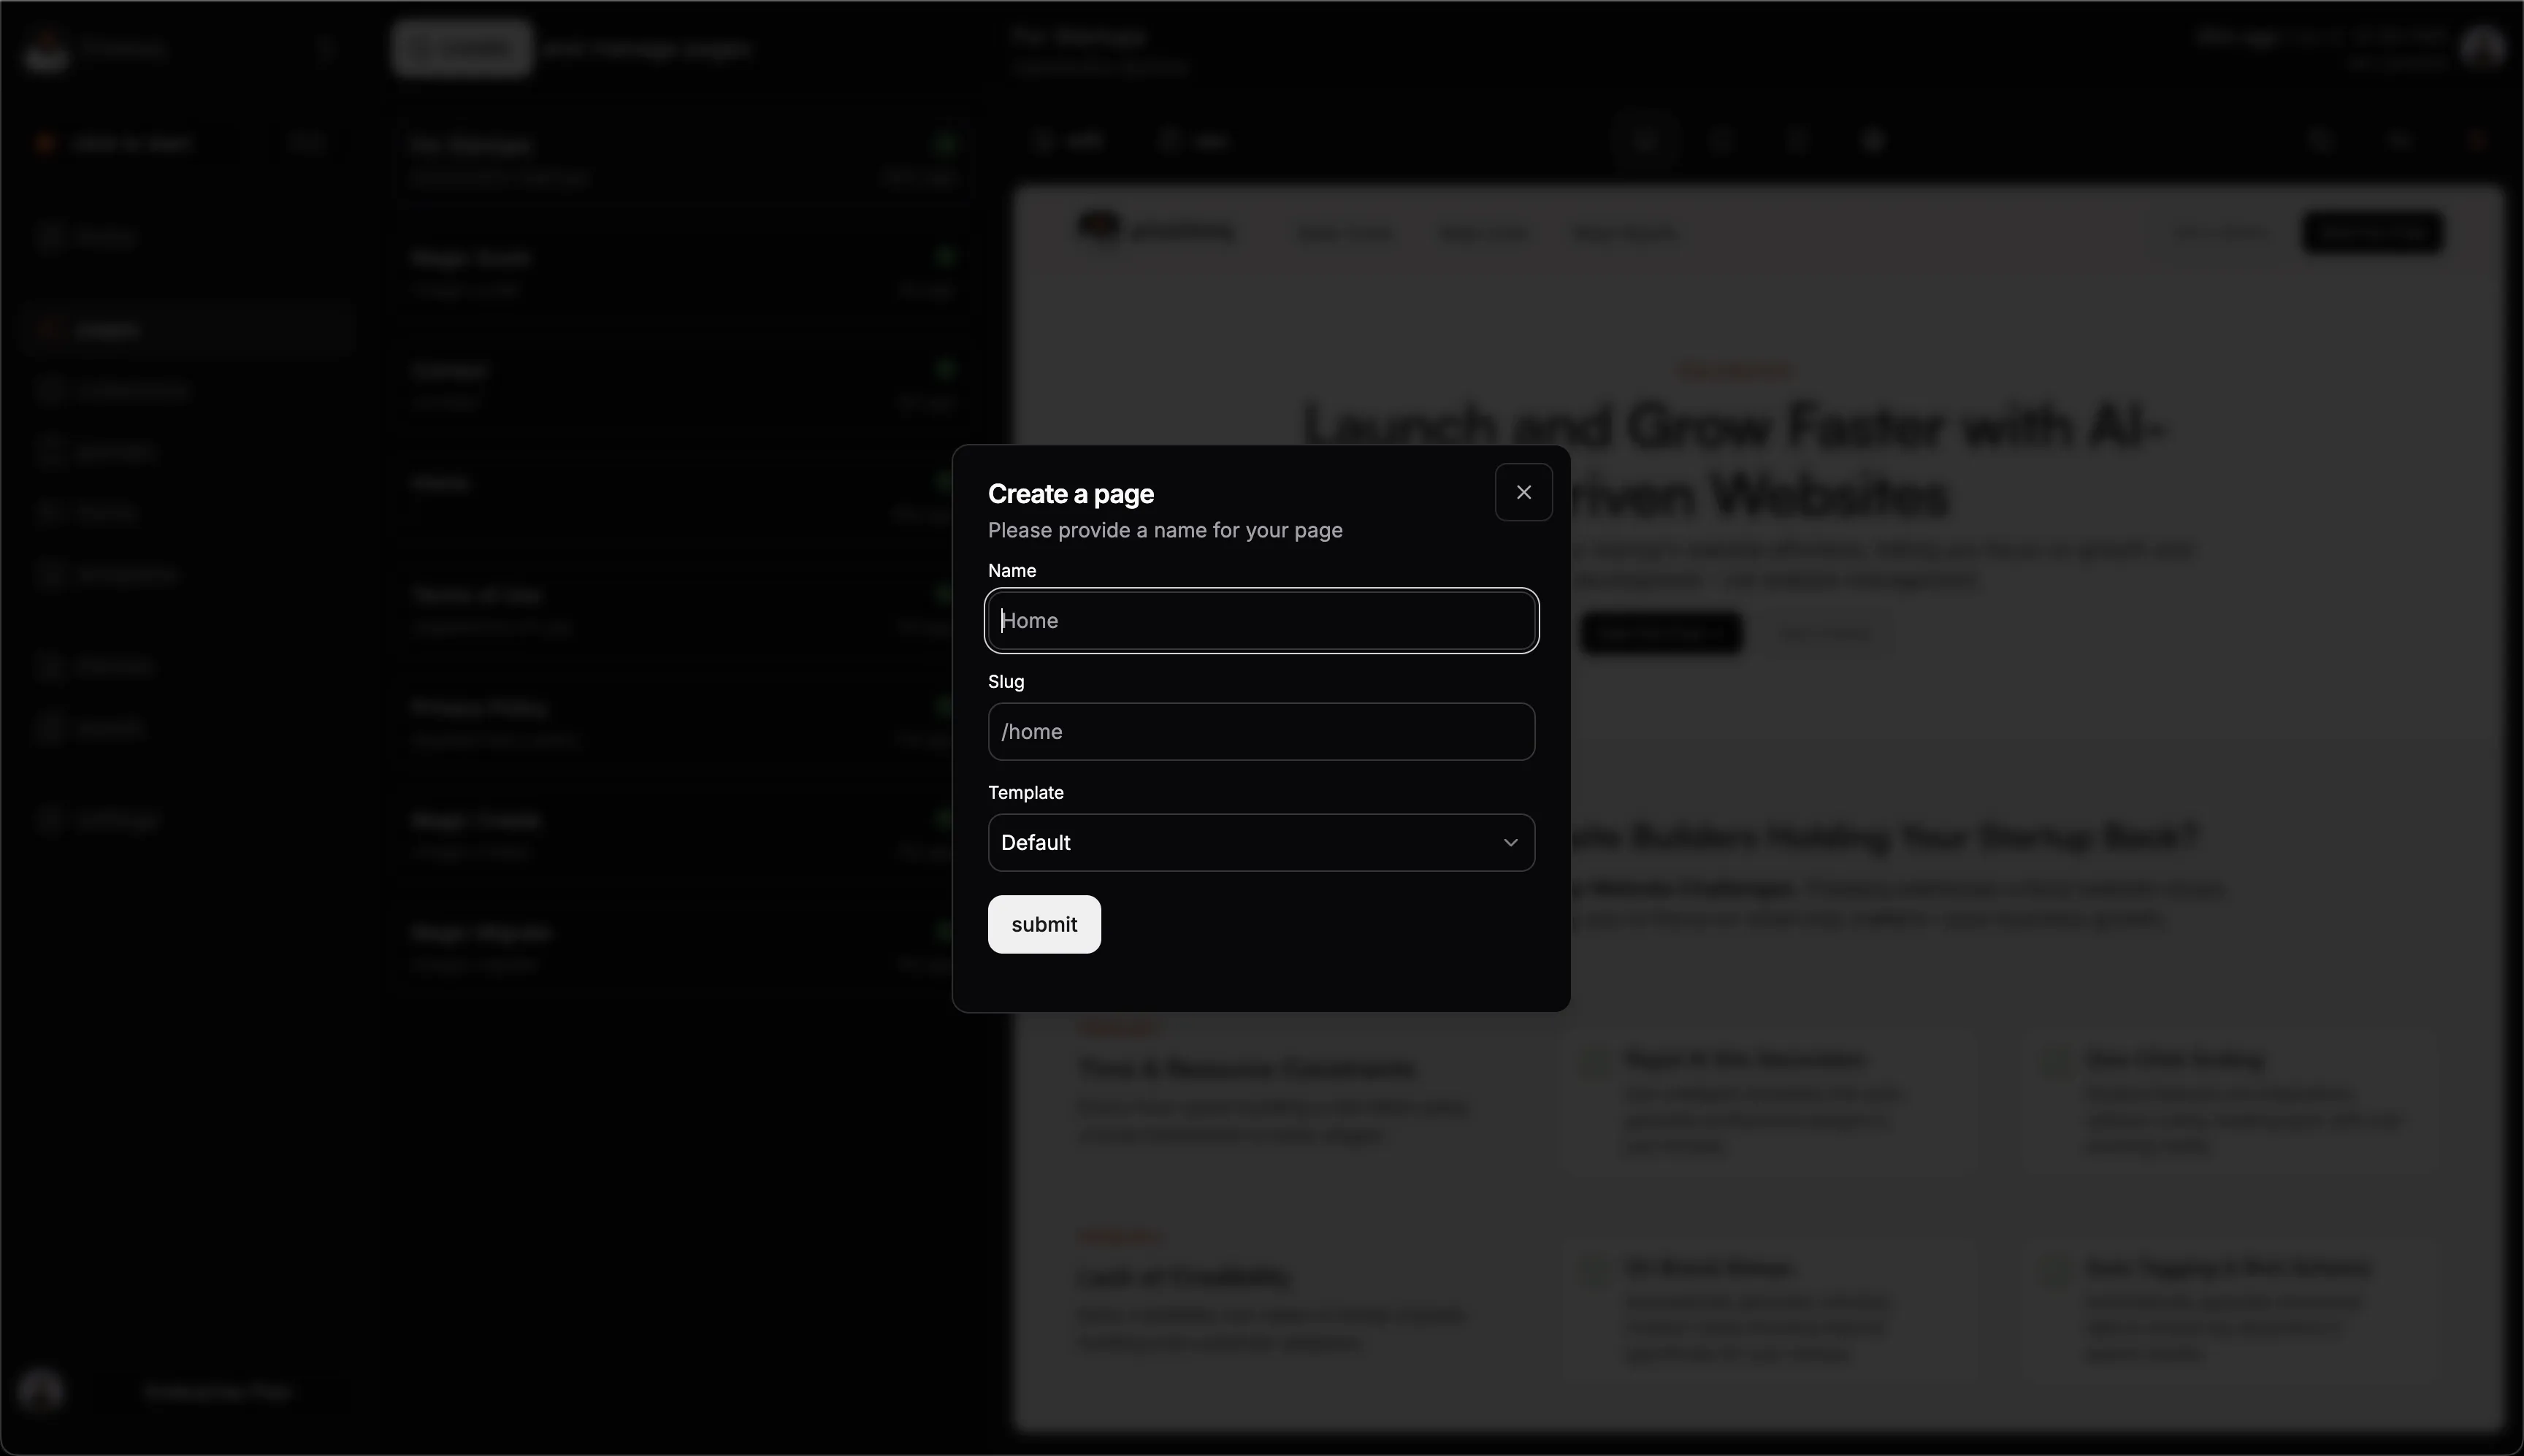
In the Create a page dialog, enter a descriptive Page Name (❶) for your page. The Slug field (❷) will auto-fill based on the name – this becomes the page’s URL path. You can adjust the slug if needed (for example, shorter is usually better for URLs). Next, choose a Template (❸). For now, leave it as Default. The default template automatically includes your site’s standard header and footer. Finally, click Submit (❹) to create the page. Pixelesq will add your new page to the list and open it for editing immediately.
Step 2: Add a Content Section
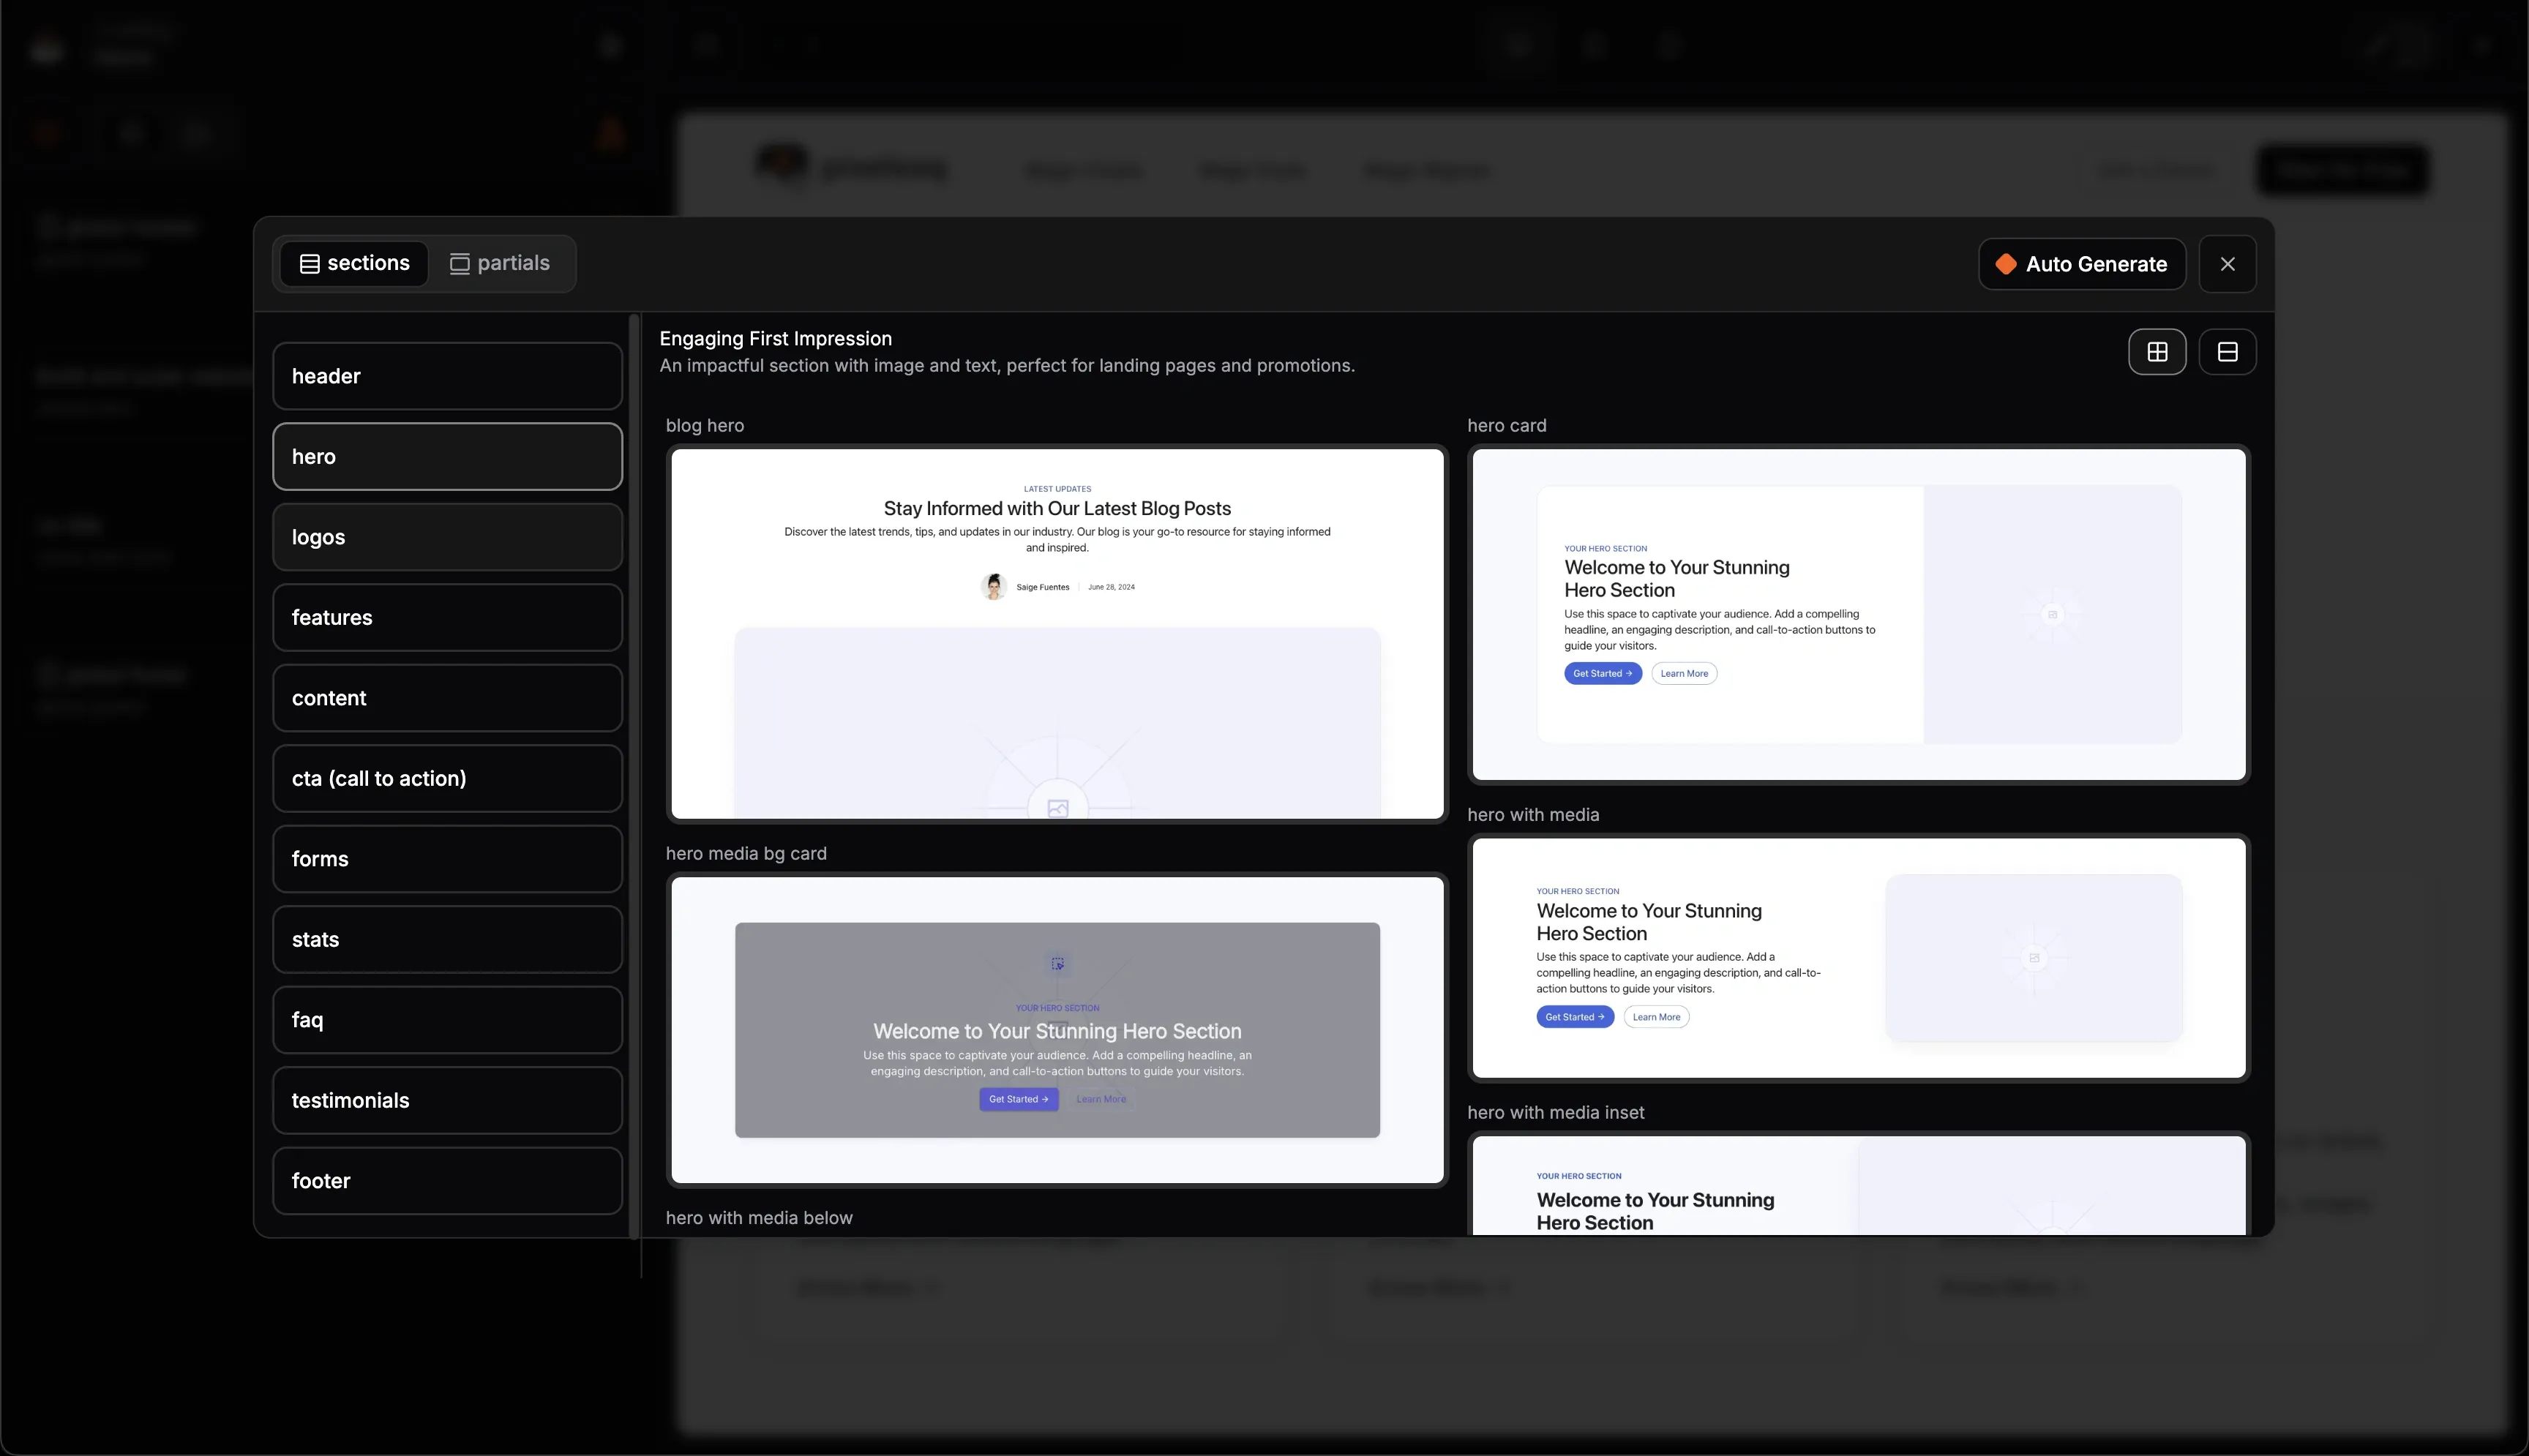
New pages start out empty in the content area (aside from the default header/footer). To give your page some content, add a pre-designed section. Click the + Add Section area where you want to insert content. This opens the section library. The library offers a variety of ready-made Sections (visual blocks like headers, text sections, galleries, and more). Make sure the Sections tab (❶) is selected. Browse categories like Hero, Content, or CTA to find the type of section you need. For your first page, try adding a Hero section – these are great for a bold title and image at the top.

Select a hero design from the list (for example, a hero with an image and headline). After you click your chosen section, Pixelesq will instantly insert it onto the page. You’ll see the new section appear in the page layout. If your template had a placeholder section, you might now have two hero sections – that’s okay! You can remove any extra section by clicking the ✕ (remove) icon on that section. Arrange your sections in the order you want by dragging them up or down in the list on the left.
Step 3: Edit Text and Images
Now it’s time to make the section truly yours. Click on the text in the newly added section to start editing. The sidebar will show fields for that section’s content:contentReference[oaicite:3]{index=3}. Here, you can type in your own words and replace images:
Update the Heading text (❶) to your page title. For example, type “Welcome to Our Site” or any catchy title. You’ll see the page preview update instantly with your new heading.
Edit the Description or body text (❷) to add a sentence or two. Keep it concise and engaging – this is what your visitors will read first.
If the section includes an image, click on the image preview. You can upload a new image or choose one from your media library. Pixelesq will fit it into the design automatically. Add a short Alt Text describing the image for accessibility (e.g., “Team working together in office”).
You can also adjust styles like text alignment or button labels if your section has them. But for now, basic text and image edits are enough to get started. Every change you make is visible in the page preview immediately, so you know exactly how it looks.
Step 4: Save and Publish
Once you’re happy with how your page looks, it’s time to make it live. First, hit the Save button to ensure all your edits are stored. The save button is usually at the top right, and Pixelesq will confirm with a “Saved page” message. Now, click Publish to push your new page to your live website. Publishing might take a few seconds – and that’s it! Your page is now live. You and your visitors can view it at the new URL.
Open your site in a browser and navigate to the new page’s address (the slug you set). You should see your content exactly as it appeared in the preview. Congratulations, you’ve built and published your first Pixelesq page!
Troubleshooting
Can’t click Publish? Make sure you’ve saved your changes first. The publish option may be disabled until you save.
Slug already in use: If you get an error about the slug, it means another page is using the same path. Use a unique slug for each page (e.g., add a number or change the wording).
Changes not visible live: If the page isn’t updating on your live site, double-check that you clicked Publish after saving. You may need to refresh your live site to see the update.
What’s Next
Now that you’ve created a basic page, you can start refining it. Learn more about how pages are structured in How Pages and Sections Work, or dive into specific tasks like Adding and Arranging Sections to continue building your site.
Effortless Integration

Targeted Audience

